Post by MugiwaraBlair on Mar 12, 2017 6:47:20 GMT
Borderlands 2 Skill Trees
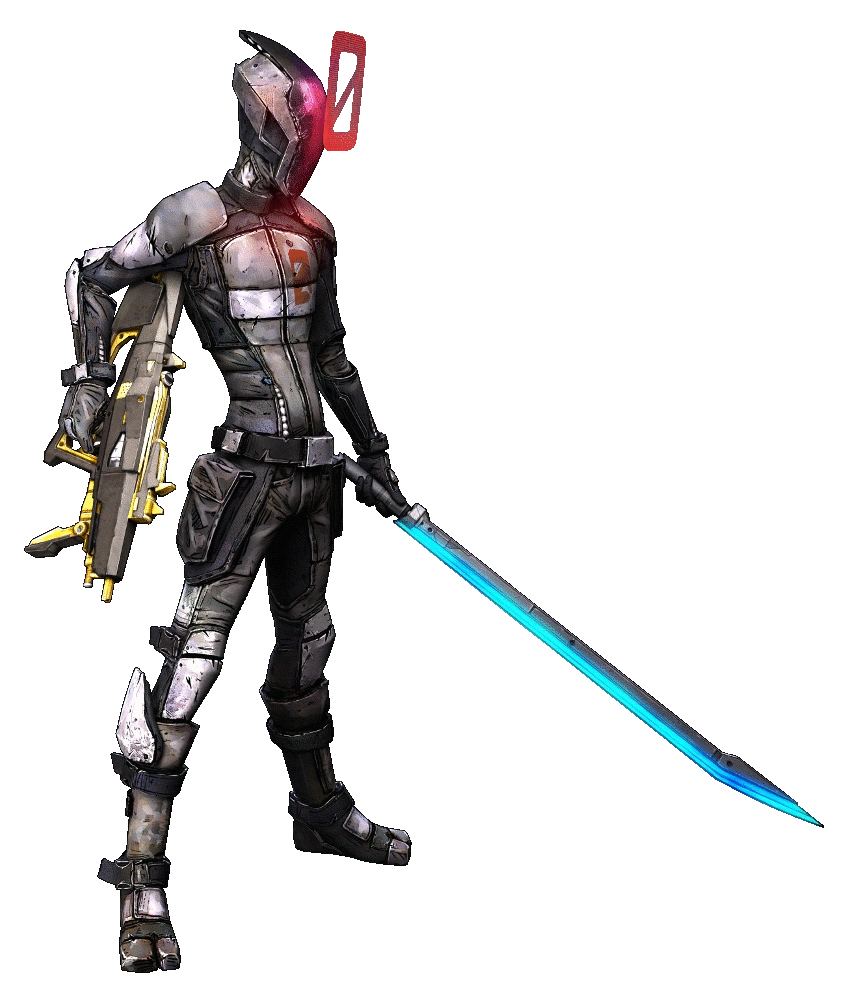
Zero the Assassin (as...A Number): Zer0 is a sniping/melee hybrid character, and the game's Glass Cannon. He's by far the squishiest class but he has the highest single target damage potential. His Action Skill is Decepti0n, it deploys an aggro drawing decoy while he turns invisible, any attack made during Decepti0n makes it end early but doing so shortens the cooldown and adds bonus damage to that attack proportional to how long you stayed invisible, up to +200% gun damage plus up to 250% critical damage or up to 650% melee damage. It has a default duration of 6 seconds and a default cooldown of 15 seconds. It also sports a few unlisted effects: it increases gun accuracy, invisible enemies like Stalkers are made visible, the decoy is a physical object so it can block attacks if you stand behind it, and grenades & Tediore reloads don't end the skill early, but they still get the damage bonus.
Sniping Tree:
-> 1st tier
-Headsh0t: +20% Critical Hit Damage. This is pretty good in general, it might seem a bit low but remember this is the sniping tree, snipers have the highest critical damage multiplier of all gun times already, boosting them further is pretty good.
-0ptics: +15% ads zoom and +60% Aim Steadiness (this is how much the sights bounce around when you take damage). The steadiness boost is good if you often snipe under fire, and the extra zoom can be nice if you like more zoom, or if you happen to use lower zoom snipers. It can be a negative if you don't like too much zoom or if your sniper already has a lot.
-> 2nd tier
-Killer: kill skill, +50% Critical Hit Damage & +70% Reload Speed for a few seconds (note, and this applies from here on out, "few seconds" means 7, all kill skill effects last 7 seconds, timer refreshes if you kill before then). Pretty good DPS boost, stacked with Headsh0t this is great for all guns and amazing if you're good at sniping multiple enemies quickly. Or you can say, headshot a mook then spend 7 seconds putting crits into a boss.
-Precisi0n: +25% Accuracy. Snipers already have accuracy in the 90s so don't pick that to help your sniping. It's pretty decent if you use non-Hyperion SMGs or shotguns tho.
-> 3rd tier
-0ne Sh0t 0ne Kill: the 1st shot fired from a full mag does +60% Damage. This kicks ass, it works on everything that has mags, even Rocket Launchers. Also has cool synergy with the Infinity pistol, since all bullets fired from it count as the 1st in the mag.
-Vel0city: +100% Bullet Speed, +15% Critical Hit Damage, +10% Gun Damage. the damage isn't much but the bonus critical on top of the other crit buffs is pretty good. The bullet speed is really nice though, it makes it so you don't have to lead your shots as much, also even tho it says "bullet" speed, this also makes rockets fly faster.
-B0re: (one point) Shots pierce through enemies, +100% Damage per enemy pierced, also highlights crit spots while in Decepti0n. This skill is awesome, one of the best in the game. It sounds great just reading it but what it doesn't say is that "enemies pierced" is actually hitboxes, some enemies have multiple hitboxes, and "+100%" means double, as in if you have a 1000 dmg gun, it will do 1000 on the 1st hit, 2000 on the 2nd, 4000 on the 3rd, etc. If you stack this right it's possible to kill lvl 72 Hyperius the Invincible (a raid boss if you dunno) with a lvl 1 white rarity pistol in less than one clip of ammo.
-> 4th tier
-Kill C0nfirmed: bonus Critical Hit Damage the longer you ads before shooting, up to +40%. This is good if you like slowly clearing camps and the like, synergizes well with 0ne Sh0t 0ne Kill, doubling your damage together. Kinda pointless during firefights though.
-> 5th tier
-At 0ne With The Gun: +125% Hip-Fire Accuracy, +50% Reload Speed and +5 Mag Size with Snipers. The reload and mag buffs are good bonus dps for snipers. The hip-fire accuracy is pretty niche tho, unless you wanna try doing 360 no-scopes or something.
-> Capstone
-Critical Ascensi0n: hitting a crit spot with a sniper gives you a stack of Critical Ascensi0n, stacks give +5% Damage and +6% Critical Damage with snipers, stacks start decaying after 6 seconds of not hitting a critical spot and after that decrease by 1 stack per 2 seconds., you can have up to 999.
So this can give you up to +4995% sniper gun damage and +5994% sniper critical damage, which would be broken as fuck. It's pretty unlikely that you'll manage to stack the buff that high though, it's theoretically possible if you play coop with a Salvador player who uses an ammo regen class mod, but outside of that you're not getting the stacks cap. On the other hand, even a fraction of that is still amazing. Even if you're not good at rapidly criting mooks, this still helps you wreck bosses.
Cunning Tree:
-> 1st tier
-Fast Hands: +25% Reload Speed, +50 Weapon Swap Speed. This is pretty good overall cause snipers tend to have slower reloads and the swap speed is nice if you use a melee bonus gun.
-C0unter Strike: after getting hit your next melee has a chance to do +250% Damage. I don't like that one much cause I'm not fond of luck-based skills, you could compensate the "chance" part by getting hit on purpose but since Zer0 is not tanky that's not a great plan.
-> 2nd tier
-Fearless: +25% Fire Rate and +15% Gun Damage while your shield is depleted. This sounds like a good emergency boost, but as I said before, Zer0 is squishy, you don't keep fighting with him when you're taking heavy damage.
-Ambush: +20% Damage from the back or to enemies aggro'd to something else than you. This sounds kinda situational but this applies 100% of the time you're in Decepti0n, which should be very often.
-> 3rd tier
-Rising Sh0t: every hit gives you +10% Gun Damage and +9% Melee Damage, this can stack up to 5 times. So up to 50% gun damage and 45% melee damage. It's ok on its own but really good if you also get Execute and Many Must Fall from the next tree.
-Unf0rseen: the decoy explodes into a shock nova when Decepti0n ends. The damage formula for this is 1.13 to the power of your level times 78 times the skill rank, so maxed out, at level 72, it deals 2 586 500 shock damage. Or up to 5 690 300 shock damage if you have a class mod that gives +6 Unf0rseen. Which is pretty solid damage. if you have Many Must Fall, each kill in Decepti0n somehow counts as ending the skill even though it extends it, so you'll get several shock explosions, which is cool.
-Death Mark: (one point) Dealing melee damage to an enemy marks it for death for 8 seconds, while it's marked the target takes +20% damage from all sources (so barrels, other enemies, etc too). Obviously this is better the more you melee, and if you melee often enough is pretty good.
-> 4th tier
-Innervate: while in Decepti0n you get +10% gun damage, +35% Movement Speed and +4% Health Regen per second. Moving faster is good cause the timer is limited, regen is nice since you're a glass cannon, not sure what's the point of gun damage tho, Decepti0n already gives a lot, this little hardly matters.
-> 5th tier
-Tw0 Fang: 30% chance to fire 2 shots at once every time you shoot. Yes this applies to full auto and rockets too, and double pellet count on shotties. From farther away with snipers chances are the 2nd bullet can miss though, still pretty cool to have.
-> Capstone
-Death Bl0ss0m: pressing the action skill button while in Decepti0n throws 4 kunai in a spread in front of you up to 5 times, they have random elements, they don't end the skill when used, as opposed to other attacks, they can apply Death Mark.
This has a couple unlisted characteristics too. Each kunai can apply DM so you can technically mark 4 enemies at once. And the kunai count as melee attacks so anything that boost melee damage buffs them too. Random element includes Slag so this can be used as a slagging method, tho obv it's not super reliable since it's randomized. Also it synergizes with Many Must Fall because every time MMF extends the timer it's counted as entering Decepti0n again, so you can throw kunai 5 times, kill something with melee (which counts kunai kills since they're melee attacks) and get a new set of 5. This means that if your kunai kill enemies, you have unlimited kunai. Speaking of kunai kills, they are a thing yes, you can kill badasses by throwing some kunai at them.
Bloodshed Tree:
-> 1st tier
-Killing Bl0w: +500% Melee Damage against low health enemies. If you're wondering, this doesn't mean mooks with low max hp, this applies to ANY enemy with 30% or less of their max health remaining. And it's calculated after everything else in the damage formula, so basically (your melee damage)+(any skill or weapon bonus that buffs melee) times 5. Or times 11 with a +6 class mod. If built and geared properly you can whittle down a boss to ~1/3 of its bar and then finish them with one melee.
-Ir0n Hand: +15% Melee Damage and +15% Health. You want to do melee, best stack the most melee buffs you can. And you're the squishiest class, a bit more hp can't hurt.
-> 2nd tier
-Grim: kill skill, +3.5% Shield Regen per second and +7.5% Action Skill Cooldown Rate. This is pretty good, shield regen helps with your not-tanky-ness and the cooldown boost to your already short cooldown helps you spam Decepti0n even more.
-Be Like Water: shooting an enemy boost your next melee by 30% and meleeing an enemy boosts your next gun shot by 20%. If your playstyle alternates a lot this is obv really good. I personally don't like it that much.
-> 3rd tier
-F0ll0w Thr0ugh: kill skill, +40 Movement Speed, +30% Gun Damage and +40% Melee Damage. Needless to say this is good. If combined with Innervate this also makes you zip around really fast during Decepti0n.
-Backstab: +40% Melee Damage when hitting an enemy in the back. It's pretty easy to get behind them when you're invisible and they're aggro'd onto your decoy, so this is another buff you can stack into your sneak melees.
-Execute: (one point) Melee Override. This makes you dash towards enemies to melee them if you put them if your crosshairs. On it's own it's not that useful but if you also get MMF it's pretty good to save you time you can extend your invisibility more. It also looks cool.
-> 4th tier
-Resurgence: killing an enemy with a melee restores up to 20% of your health depending on how low it is. That's pretty cool, if you built up your melee right you can run around and one-shot a few mooks to get full hp pretty quickly.
-> 5th tier
-Like The Wind: +15% Gun Damage and +15% Melee Damage while moving. Speaking of running around one-shotting mooks, this helps you do it even more. Not 100% confirmed but I'm also pretty sure that Execute's dash move counts as "while moving".
-> Capstone
-Many Must Fall: melee kills during Decepti0n spawn another decoy and extend the timer.
Yes you still get the huge melee bonus. Ideally if you stacked enough melee buffs you can enter Decepti0n at the start of combat and only come out of it after you butchered every enemy. This skill is amazing.
-----------------------------------------------------------------
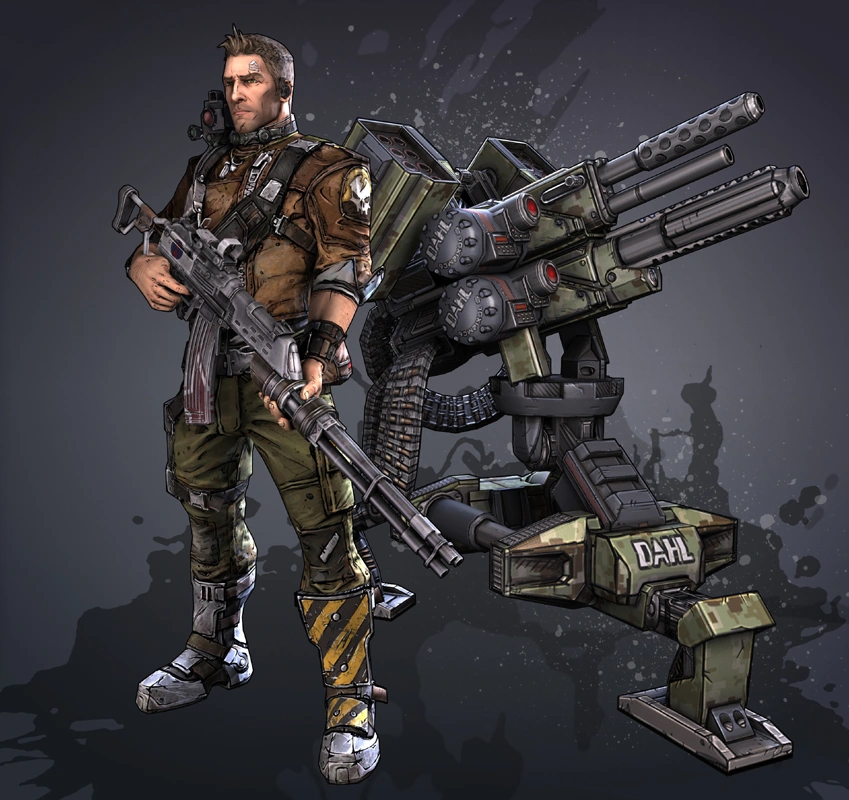
Axton the Commando: Axton is the "boring but practical" class so to speak, and kind of a Jack of all Trades. He has good survivability and solid damage. He isn't Master of None either though, he's the best with grenades, Torgue Weapons, Rocket Launchers and Tediore reloads, he even holds the fastest TTKs on raid bosses, by chucking tediores at them. His Action Skill is Sabre Turret, predictably enough it deploys a turret. It takes 3 seconds to unfold and start firing after you throw it out, it lasts 20 seconds and has a cooldown of 42 seconds by default. It fires in bursts of 8 shots. It can be used as cover by standing behind it, even protecting you from raid boss novas, though obv it'll take damage. Note that the Sabre Turret counts as its own thing, it's bullets aren't boosted by your gun damage, it's rockets aren't boosted by your explosive upgrades and it's damage doesn't heal you when holding a Moxxi gun. On the other hand, it spawns at the instance's level, not yours, so even if you're underleveled, it is not. This extends to OP8, the turret will be level 80 there.
Guerilla Tree:
-> 1st tier
-Sentry: adds 5 shots per burst and 10 seconds of duration, bringing the totals to 13-shots bursts and 30 seconds of turret duration. You should have this regardless of what build you're going for.
-Ready: +40% Reload Speed. This is a decent dps boost but personally I don't use it because higher quality guns already have quick reload speeds.
-> 2nd tier
-Laser Sight: +50% Turret Accuracy. So this sounds good on "paper" but in practice, the turret hits pretty much everything by default, the only things this skill helps hitting is Rakks if they're really far away (but rakks always divebomb you so they put themselves in range) and Surveyors because they fly too fast, but the turret can hit them a bit still, and they also put themselves more in range when attacking, sometimes they even stop and hover in place when repairing Loaders.
-Willing: +75% Shield Recharge Rate and -60% Shield Recharge Delay. I don't think I need to comment this, it's obv great, especially when paired with Preparation.
-> 3rd tier
-Onslaught: kill skill, +30% Gun Damage and +60% Movement Speed. This is great for dps and indirect survivability, I don't personally use it because I put points in other things for my build, which mostly uses the other 2 trees, but if you want to use Guerrilla you should pick this.
-Able: damaging an enemy regenerates 2% of your health per second for 3 seconds. This isn't a kill skill but it "stacks" the same way, if you deal damage again within 3 seconds the timer resets. Turret damage doesn't count but DoTs do, every elemental tick resets this. Also pretty good survivability then, better if you use more elemental weapons.
-Scorched Earth: (one point) adds 22 rockets to every burst fire of your turret. This kicks ass, makes your turret so much better. On top of a massive damage boost this also does stuff like, damaging badass Nomads through their metal shields with the splash damage. Note: it reduces the damage from the turrets normal guns by 13%, but it's still a massive boost to total turret damage anyway.
-> 4th tier
-Grenadier: increases your grenade capacity by 5. This isn't bad but because of ammo from drops and boxes you don't usually run out anyway. It's useful while leveling cause it can save you Eridium for other SDUs, and going from 3-4 grenades to 9-10 is more useful than going from 10 to 15. It also solidly boosts the damage of the "throw all your grenades at the boss" tactic.
-> 5th tier
-Crisis Management: +35% Gun Damage and +30% Melee Damage when your shields are depleted. This might sound like a good emergency boost but it's actually pretty meh. If you have Willing, which you should, your shields being depleted is a very short period, having both is counter productive and Willing is more useful more of the time. Also the melee boost is kinda dumb
-> Capstone
-Double Up: adds a second gun to the turret and both guns fire slag bullets. So this isn't really bad but, eh. Slag doesn't boost the slag bullets, your turret will slag stuff for you but it doesn't boost the turret itself. It will boost the missile volleys but if you slag with a gun or grenades instead, that'll boost the missiles and the turret shots too, by making your turret slag element you lose that. True having 2 guns per turret does double the turret guns damage, but so does getting Gemini and having 2 turrets, which you can boost further by slagging, and which also gives you 44 missiles bursts.
Gunpowder Tree:
-> 1st tier
-Impact: +20% Gun Damage and +15% Melee Damage. Good flat boost, the melee boost isn't that useful but it's not a negative.
-Expertise: +70% Weapon Swap and Aim Speed; +35% Movement Speed when ADS. Eh...I mean, do you switch guns mid-fight that often ? Aim speed is quick enough for the majority of guns anyway and at least personally, I don't really move much while ADS, or when I do I don't feel like it's too slow and hinders me.
-> 2nd tier
-Overload: +50% Magazine Size for Assault Rifles. Pretty clear cut, this is good if you use ARs, pointless if you don't.
-Metal Storm: kill skill, +60% Fire Rate and +75% Recoil Reduction. Pretty great dps skill, shooting a lot faster and being able to stay on the crit spot with automatic fire wrecks shit. I don't use it for my build cause putting the 5 points elsewhere helps me more.
-> 3rd tier
-Steady: +40% Recoil Reduction, +25% Grenade Damage, +20% Rocket Damage. Pretty baller, less recoil as a passive is really useful, grenade damage also boosts Tediore reloads and Torgue weapons (gyrojets are counted as grenades) and rocket damage also boosts the grenade launcher type ARs, since their "grenades" are counted as rockets.
-Battlefront: +30% Gun, Melee and Grenade Damage while the turret is deployed. Aside, like Impact, the melee boost being of questionable use, this is great since you should have your turret out most of the time. Also goes really well with the anti-boss tactic of "throw out the turret, chuck all your grenades at it's feet and pump it's face full of lead" since it boost 2 of those 3 things.
-Longbow Turret: (one point) +10000% deploy range and +110% Turret Health. So first off, I don't know if the range boost is legit 10k% or it's just a silly number Gearbox used as a joke, but you can send your turret across pretty huge maps with this, if you find a distance where it doesn't work it's probably too far away for it to shoot whatever you're fighting anyway. A little over doubling it's health is really useful too. Note, if you throw it at a wall or ceiling without also having Mag-Lock, it will bounce off and fall to the ground before starting to unfold, so you'll extend the deployment time if you do that. If you throw it out of the map though it'll just despawn without deploying and you'll keep your Action Skill charge.
-> 4th tier
-Duty Calls: +25% Gun Damage and +15% Fire Rate with Non-Elemental Guns. If you find good non-elementals this is great, it's just a bummer if you spec into this and happen to only find elemental guns. But you can respec pretty easily in BL so not really an issue.
-Do or Die: (one point) allows you to throw grenades in Fight For Your Life, also +10% Grenade and Rocket Damage. Stacks well with Steady, applies to the same misc stuff. Grenades in FFYL can have extra uses depending on the type of grenade mod you're using. Singularity can be used to draw fleeing enemies to you for exemple, Homing can be similarly useful. MIRV too if you're surrounded by melee enemies.
-> 5th tier
-Ranger: +5% to Gun Damage, Accuracy, Critical Hit Damage, Fire Rate, Magazine Size, Reload Speed and Max Health. This is a bit hard to rate, on one hand, the boosts are pretty small, but if they were big boosts this would be pretty unbalanced. It woulda been better imo if they cut say, accuracy, crit damage, reload and maybe firerate, and just made it like, +15% Gun Damage, Magazine Size and Max Health.
-> Capstone
-Nuke: sets off a mini mushroom cloud when you deploy your turret. The initial blast is explosive damage and it applies burn DoT to anything it doesn't kill. The explosion goes through cover and has a range of 15 meters centered around the turret. The Explosive and Fire DoT damage scale with Axton's level (not the turret's) but isn't boosted by Skills, Relics or Badass Ranks, because those are buffs to grenades, guns or rockets specifically, not to elemental damage itself, and the Nuke counts as pure elemental damage.
Survival Tree:
-> 1st tier
-Healthy: +30% Max Health. 30% is the 2nd biggest health boost total of any +max health skill in the game. Axton can also get his health to +40% if you pick Forbearance and Ranger on top of this. So pretty solid.
-Preparation: +15% Shield Capacity and +2% Health Regen per second while your shield is full. Also pretty good for tanking, especially combined with Willing.
-> 2nd tier
-Last Ditch Effort: +40 Gun Damage and +70% Movement Speed while in FFYL. Some people are all "this is shit, if you're good and are using the tanking skills tree you should never go in FFYL". Shut up, you're gonna go down some times, and when you do, doing 40% more damage will help alot, also you crawl in FFYL, any speed boost to that is nice.
-Pressure: Up to +70% Reload Speed and -60% Shield Recharge Delay depending on how low your health is. This helps when get back to readiness faster when you take cover but when in cover you usually already have enough time. This isn't bad, it's just less useful in practice as other stuff.
-3rd tier
-Forbearance: -40% status effects duration on you and +5% Max Health. This is the same as Salvator's Asbestos but with a bit of max hp on top. Helps a bunch with surviving DoTs, which are more dangerous the more you up the difficulty, so this is good and gets better over time.This also makes Slag shorter and obv taking double damage (triple in UVHM) for less long is kinda useful.
-Quick Charge: kill skill, +5% of your shield per second. Basically "Able" but for shields. Same comments apply. Having both would be pretty good too.
-Phalanx Shield: (one point) turret projects a shield bubble about 3 meters wide. It can be broken but mostly only by direct impact damage, it can take elemental DoT based attacks (like the Warrior's fire breath) for the entire duration of the turret. Speaking of which, the Phalanx completely blocks status inflicting attacks and novas. Enemy projectile don't traverse it (obv) but yours do. Melee attackers can walk through and it the turret directly but leaping thrown melees (like Psycho axes) are still blocked and leaping melees (like Goliath jump attacks) will be absorbed. The shield will take the damage and the Goliath's slam will do nothing to the turret or anyone inside the shield.
-> 4th tier
-Resourceful: +25% Action Skill Cooldown Rate. Gives you your turret back faster, why wouldn't you take this ?
-Mag-Lock: (one point) your turret can now stick to walls and ceilings. This says "mag" but it will stick to all surfaces. This is really useful. On top of increasing deployment tactics, especially combined with Longbow Turret, this also increases the turret's survivability because enemies have a harder time shooting in on a wall or ceiling for some reason. Also if you throw it on a temporary surface, like say an ION-Loader's shields, it will stick to it and stay in mid-air when they shield turns off.
-> 5th tier
-Grit: 20% chance to ignore damage that would kill you and instead instantly regain 50% of your Max Health. 20% is too low to be reliable or that useful imo so I don't use this. You can get this to 44% chance with class mods that give +6 to it though.
-> Capstone
-Gemini: allows you to deploy 2 Turrets. As mentioned before, this is way better than Double Up. All turret upgrades apply to the 2nd one too, so they'll both have missile pods, stick to walls, have shields, set off Nukes, etc. Notes: they shared the duration bar if you deploy the 2nd with 2 seconds left, it will only last for the remaining 2 seconds. Reclaiming 1 turret reclaims both of them. If you reclaim 1 turret while the other is in the middle of unfolding it will explode instead of being reclaimed normally and this counts as a kill, it will trigger all your kill skills.
-------------------------------------------------------------------------------------------------------------------

Maya the Siren: Maya is the elemental crowd control/debuffer class, and also the primary healer. She's also pretty much the best tank in the game outside of Grog-Nozzle!Salvador and the 2nd best sniper after Zer0, and even then, that's only in terms of pure damage and boss wrecking, Maya kills mobs better with snipers than Zer0 does. Unless you use Cat type class mods she sorta lags a bit in pure DPS but that's where being the crowd controller comes in. Rather than pure gun damage, explosions or crushing melee, Maya stacks all the status effects on everything, locks them in place and throws enemies around until they helplessly die. Her Action Skill is Phaselock, it traps the targeted enemy in a sphere where they stay immobilized. The base duration is 5 seconds, base cooldown is 13 seconds (which I'm pretty sure is the fastest recharging Action Skill across all VHs). Without any skills it deals no damage on it's own except to targets who cannot be Phaselocked, which I'll list below. The damage formula for this is 200 Base Damage times 1.13 to the power of your current level. So about 1.3 million at level 72, which is pretty low, especially since lots of the enemies that can't be Phaselocked are bosses and enemies in UVHM have regen. However if you have Helios and/or Ruin, those are still applied even if the target isn't immobilized. Still at level 72, Helios will deal 53 056 on the initial hit followed by 59 688 Burn DoT per second for 9 seconds, totalling 537 192 damage (spoilers, Helios is garbage at high levels). Ruin otoh, deals 3 initial hits of 47 750 each, Slag then Shock then Corrosive in the animation but they're considered simultaneous by the game so the initial Shock and Corrosive hits aren't multiplied by Slag. Their DoTs are though. They both do 47 750 dmg/s but the Shock DoT lasts 14.4 seconds while the Corrosive DoT lasts 57.6 seconds, totalling 2 062 800 and 8 251 200 respectively. Which is a lot better, and also applies not only to the target but to every other enemy around it.
List of enemies who cannot be Phaselocked: Threshers in general, Loot Goon Goliaths, One Armed Bandits, Buzzards, Constructors, Ultimate Badass Varkids, most land vehicles, Sand Worms in general, both Handsome Jack and his Body Double, Pyro Pete, Motor Momma, Piston, Dukino's Mom, Saturn and all Raid Bosses.
Motion Tree:
-> 1st tier
-Ward: +25% Shield Capacity and -40% Shield Recharge Delay. Pretty solid tier 1 shield skill, not really any reason you wouldn't pick this.
-Accelerate: +15% Gun Damage and +20% Bullet Speed. It's a bit low at first glance but you have to know: Elemental guns all have unlisted extra splash damage, which is a % bonus based on the base damage of the gun. On Maliwans iirc the splash is 80%, so with an hypothetical 100 dmg gun, you'd do 115+92 dmg rather than 100+80. And obv this gets exponentially better the higher level your guns are.
-> 2nd tier
-Suspension: increases the duration of Phaselock by 2.5 seconds. Obv you'll want to take this. Aside making your crowd control better, this also boosts all the "while Phaselock is active" skills.
-Kinetic Reflexion: kill skill, bullets deflect off of you, reducing damage to you by 50% and dealing 100% damage to enemies. This is a mixed bag. Positives are, it says "reducing damage", which makes it sound like Damage Reduction, but it's actually Damage Resistance. The difference is 50% Reduction would actually be 33.33% damage mitigation, whereas 50% Resistance mitigates 50%. We know this because if you use a Class Mod to boost this to 11/5 you'll have 110% Bullet Damage Resistance and Bullets actually heal you. Also deflected bullets count as your bullets, so they're boosted by Accelerate, Reaper and Immolate, they can re-reflect if you have Chain Reaction and they can apply Cloud Kill. Negative is mostly that, enemy damage is pretty small compared to enemy health, especially at later levels, so even doing 220% damage at 11/5 they're not that effective at killing enemies. If you want this effect it's better in practice to get the Antagonist seraph shield.
-> 3rd tier
-Fleet: +50% Movement Speed when your shields are depleted. This kinda makes Ward counter-productive, and better shields all the time is better survival than moving faster a little bit here and there. You can make it work if you build based on it, with Banshee class mods, if you want. But it's better to just just be a tank imo.
-Inertia: kill skill, +4% Shield Regen per second and +50% Reload Speed. This isn't bad, you can safely take this without wasting the points. I personally don't use it on my build because I have Ward and Foresight at 10/5 so I have -80% Shield Delay and +50% Reload Speed as always-on passives, making it pretty obsolete.
-Converge: (one point) This adds a Singularity effect to Phaselock, except with a way bigger range than singularity grenades. This skyrockets your crowd control, boosting the effectiveness of Helios, Ruin, Scorn and Chain Reaction. It also deals a negligible 53 056 damage (at lvl 72) to every enemy it pulls in. You should always pick this.
-> 4th tier
-Quicken: increases Phaselock cooldown rate by 30%. Good but since the cooldown is already only 13 seconds you're not really losing much by putting your points elsewhere.
-> 5th tier
-Sub-Sequence: 100% chance that the Phaselock bubble transfers to another enemy if the target dies before it ends. So the thing is, the transfer process is that the bubble slowly floats off towards the closest enemy. With Converge this can be not too bad since enemies will be close, but if they're farther for any reason, this makes it so you have to wait for the bubble to uselessly float around before the cooldown starts. It's kinda meh imo. IF you're interested though, note that the bubble locking on a new target sort of counts as a new activation so it will proc Helios, Ruin and Converge again.
-> Capstone
-Thoughtlock: instead of immobilizing the target Phaselock now brainwashes them to your side, also increases the Duration by 4 seconds. It says it increases the cooldown too but it actually doesn't. This is a really lame Capstone. It has a few positives (aside the obv duration boost), namely that it will make Surveyors heal you, and Elated, Wreck and Chain Reaction still work with the target is brainwashed. Converge and Helios also proc. The negatives though are that, speaking of, Helios activate, so now your new ally is taking Burn DoT. No biggy, don't pick Helios, fine. But it doesn't proc Ruin, if you have both, this one removes Ruin. Dealbreaker right there. Also enraged Goliaths stay berserk and still attack you, any enemies that can't be immobilized also can't be brainwashed, and brainwashed enemies aren't counted as allies, they just have 0% aggro towards you, meaning you (and coop partners if applicable) can still damage them, so all of your AoE elemental stuff is likely to kill your "ally" and you also lost a big chunk of your crowd control. And to top it off, as I mentioned above, enemy damage is low compared to enemy health, so chances are your mind-puppet ain't gonna kill shit either.
Harmony Tree:
-> 1st tier
-Mind's Eye: +25% Critical Hit Damage and +30% Melee Damage. Again, not sure what the point of the melee boost is. Critical buff is good though. Crit bonuses are multiplicative on top of the gun damage so this another thing Accelerate indirectly boosts.
-Sweet Release: killing a Phaselock enemy releases 5 healing orbs that can heal you and allies for up to 15% of your max health. Some precisions, if you're playing solo then obv, all orbs go to you. The 15% of max health is based off Maya's health, so in most case it should actually be more than 15% of allies' health. This is pretty good healing regardless of solo or coop play, ofc being better personal survivability if you're alone, although if boosted by a class mod there can be enough orbs to fully heal you and have leftovers to heal the others too.
-> 2nd tier
-Restoration: +15% Max Health and can attack allies to heal them for 30% of the damage. For solo play you don't really need this, even if you want lots of health, since you can do that with class mods, shields and relics. If playing coop, you don't really need to max this out, since player damage is balanced to kill enemies who have exponentially more hp than you, even with 6% at one point investment you can fully heal an ally pretty quickly.
-Wreck: +50% Fire Rate and +30% Gun Damage while you have an enemy Phaselocked. Great dps boost, if it's not clear that buffs are general buffs for the duration of Phaselock, you don't do +30% damage only to the target, it's basically her version of Axton's Battlefront.
-> 3rd tier
-Elated: +5% Health Regen per second for you and allies while an enemy is Phaselocked. Same deal as Restoration, the 5% is based off Maya's hp so usually allies will be healed more than 5% of their hp per second. Needless to say that's also great survivability and useful regardless of solo or coop.
-Recompense: taking damage has 50% chance to deal equal damage to your attacker. So normally I'd say being chance based makes it dubious, but this has no proc cooldown and it's 50% so basically, enemies in general take the damage of half of their attacks. The reason this is dubious anyway is that, as mentioned before, enemy damage does pretty much jack shit to enemy health.
-Res: (one point) using Phaselock on a downed ally instead of an enemy instantly brings them out of Fight For Your Life. This still counts as activating Phaselock so you'll be on cooldown. Like Phaselock it also has kinda limitless range since Phaselock is based of targeting, so you can scope on a far way target with sniper (or any scoped gun you have) and Phaselock will work. The downside of this is, it's pointless for solo play, obv.
-> 4th tier
-Sustenance: +2% Health Regen per second. Pretty straightforward, this gives you always-on passive healing. As it's % based it's also better the higher max hp you have. It helps a bunch against DoTs.
-> 5th tier
-Life Tap: kill skill, +6% Life Steal. So pretty much, this gives you a Moxxi Gun effect without having to hold a Moxxi Gun. You have to kill to sustain it but when in battle with mobs kill skills are more or less always on, and 6% is also higher than most Moxxi Guns, only beaten by the Rubi (12%) and Grog Nuzzle (65%), except you can have Life Tap while using way more powerful weapons. The only life steal effect better than this is Grog-Nuzzle!Salvador, which is lolwtf broken, so that's pretty good.
-> Capstone
-Scorn: Melee Override, throws a ball of Slag that constantly damages enemies near it, has an 18 second cooldown. This is super useful. It does many things so I'll just list in no particular order. First warnings: it targets anything that you can damage in an area around it so it can explode barrels if there are any near you when you activate it, and if it explodes near you it will slag you. Positives, uses and misc characteristics: It doesn't count as a Melee Attack so melee boosts don't improve it, however melee cooldown buffs do make it recharge faster. It also doesn't work for any task that require melee attacking, like issuing or accepting a Duel or getting Bullymong Fur for the quest Bad Hair Day. You can use it while climbing ladders and during Fight For Your Life (which is awesome, double/triple damage while trying to revive). It doesn't trigger aggro, you can Slag a far away enemy with it and still snipe them while they stand around. As stated before it will target everything you can damage, so it will "open" Bullymong, Skag and Stalker piles, explode barrels, etc, and more importantly (and awesomely) enemy rockets, including missile barrages from Constructors or Saturn, meaning you can stand in front of a giant missile spewing robot, throw Scorn into it's barrage, and take zero damage from their strongest attack. It technically explodes on contact with any surfaces but it's hitbox is actually just a small orb in the center of it so most of the type it more or less passes through objects. Note/Tip: it's better to throw it between or above enemies because that way it will Slag the entire group (ya btw it can Slag entire groups) instead of just the one you aimed at if thrown directly at an enemy.
Cataclysm Tree:
-> 1st tier
-Flicker: +30% Elemental Effect Chance. Being more likely to apply DoTs is pretty good when you're the DoT class. Note though than it's multiplicative 30%, not additive, so with a base 50% chance elemental gun you would have 56.5%, not 80%.
-Foresight: +20% Magazine Size and +25% Reload Speed with all gun types. Pretty good indirect dps for a tier 1 skill. Especially useful with Snipers and Jakobs ARs imo.
-> 2nd tier
-Immolate: adds +50% Damage as Fire Damage to all shots fired during FFYL. The 50% is based off your equipped weapon's damage, which already sounds pretty good right ? Bonus, it's calculated multiplicatively after everything else in the damage formula, and is also boosted further itself on flesh targets, so not (base gun dmg + 50%) but (base gun damage + gun dmg skills (x crit multiplier if you happen to crit) x slag x 1.5 (x 1.75 if shooting a flesh enemy). Basically, this kicks Last Ditch Effort in the dick.
-Helios: Phaselocking an enemy causes a fiery explosion. This is pretty cool, especially combined with Ruin, resulting in Phaselock having all the elements. Unfortunately, as I spoiled above, it does more or less useless amounts of damage at high levels. It also triggers before Ruin so it doesn't get the Slag boost (unless you slagged stuff before Phaselocking). It's not terribad but points are better spent elsewhere.
-> 3rd tier
-Chain Reaction: while you have an enemy Phaselocked, all of your bullets that hit an enemy have 40% chance to ricochet into another enemy. Ricocheted bullets still do full damage. This is chance based but, if you're using a rapid-fire weapon, like an SMG, which you should be because these are the best for applying DoTs, that's a lot of extra damage to enemies you're not even shooting at. As stated above, reflected bullets from Kinetic Refelction or the Antagonist can also proc Chain Reaction. If ricocheted shots were from guns with splitting projectiles (not multi-pellet like shotguns) like the Bekah, Lyuda, Pimpernel, Unkempt Harold, etc, the ricochet will also split. Yes this is potentially hax.
-Backdraft: adds Fire Damage to your Melee Attacks, also triggers a Fire Nova when you shields are depleted, shields need to recharge between novas. Again, melee boost is pretty pointless, however cool it is to set people of fire by punching them. The nova effect will trigger before the shield nova if you're wearing a nova shield, it doesn't count as an actual nova though so it can't be used to progress or complete Nova Shield related challenges. The Nova doesn't hit that hard either, at least at high levels. Ideally give this a skip.
-Cloud Kill: (one point) shooting an enemy creates a corrosive cloud at their location that lasts 5 seconds and also damages any enemy that enters it, only one cloud can be active at a time. Notes, even if the enemy exits the cloud, they still take the damage because it applies DoT. You can damage yourself with it but only if you're within it when it's created, it's safe to enter if you pass through after it has appeared. So try not to shoot stuff point plank if you have this, unless there's already an active cloud somewhere else. I couldn't find the damage formula for this but in my file at level 72 it does 1115K per tick for 5 seconds, and there are more than one DoT tick per second. It also seems to ignore elemental multipliers as it does the same damage on robots and armor as it does on fleshy targets. To give you an idea, it does enough damage to make Dr.Zed's E-Tech tutorial quest basically impossible because the Corrosive Dot kills the bandits before the E-Tech machine gun does, even while shooting full-auto directly at them. Funny side-note, it used to be garbage, it was buffed by ~3900%
-> 4th tier
-Reaper: +40% Gun Damage to enemies above 50% Health. This is multiplicative and works on everything, even bosses. Also it's specifically "above 50% *health*" so the bonus applies to all shields too. Great DPS buff, really good for sniping too.
-> 5th tier
-Blight Phoenix: kill skill, adds a Corrosive and Fire Damage AoE around you. So this can explode barrels near you and it's pretty crap at actually killing enemies at high levels. However, enemies have exponentially more health than players, and you know what else is a kill skill ? Life Tap. So long as you kill every 7 seconds or less and stay relatively close to enemies, you're basically immortal. It also looks pretty dope when active, giving you green and orange fiery wings.
-> Capstone
-Ruin: Phaselock now Slags, Shocks and Corrodes all nearby enemies. THE elemental AoE, this skill is awesome. In TVHM this can kill an entire mob on it's own. Not so much in UVHM but it still stacks enough DoTs on things to counteract their regen, and still kills some of the weaker mooks, which is pretty good considering the exponential max hp curve plus a 4x multiplier than enemies have in UVHM.
Zero the Assassin (as...A Number): Zer0 is a sniping/melee hybrid character, and the game's Glass Cannon. He's by far the squishiest class but he has the highest single target damage potential. His Action Skill is Decepti0n, it deploys an aggro drawing decoy while he turns invisible, any attack made during Decepti0n makes it end early but doing so shortens the cooldown and adds bonus damage to that attack proportional to how long you stayed invisible, up to +200% gun damage plus up to 250% critical damage or up to 650% melee damage. It has a default duration of 6 seconds and a default cooldown of 15 seconds. It also sports a few unlisted effects: it increases gun accuracy, invisible enemies like Stalkers are made visible, the decoy is a physical object so it can block attacks if you stand behind it, and grenades & Tediore reloads don't end the skill early, but they still get the damage bonus.
Sniping Tree:
-> 1st tier
-Headsh0t: +20% Critical Hit Damage. This is pretty good in general, it might seem a bit low but remember this is the sniping tree, snipers have the highest critical damage multiplier of all gun times already, boosting them further is pretty good.
-0ptics: +15% ads zoom and +60% Aim Steadiness (this is how much the sights bounce around when you take damage). The steadiness boost is good if you often snipe under fire, and the extra zoom can be nice if you like more zoom, or if you happen to use lower zoom snipers. It can be a negative if you don't like too much zoom or if your sniper already has a lot.
-> 2nd tier
-Killer: kill skill, +50% Critical Hit Damage & +70% Reload Speed for a few seconds (note, and this applies from here on out, "few seconds" means 7, all kill skill effects last 7 seconds, timer refreshes if you kill before then). Pretty good DPS boost, stacked with Headsh0t this is great for all guns and amazing if you're good at sniping multiple enemies quickly. Or you can say, headshot a mook then spend 7 seconds putting crits into a boss.
-Precisi0n: +25% Accuracy. Snipers already have accuracy in the 90s so don't pick that to help your sniping. It's pretty decent if you use non-Hyperion SMGs or shotguns tho.
-> 3rd tier
-0ne Sh0t 0ne Kill: the 1st shot fired from a full mag does +60% Damage. This kicks ass, it works on everything that has mags, even Rocket Launchers. Also has cool synergy with the Infinity pistol, since all bullets fired from it count as the 1st in the mag.
-Vel0city: +100% Bullet Speed, +15% Critical Hit Damage, +10% Gun Damage. the damage isn't much but the bonus critical on top of the other crit buffs is pretty good. The bullet speed is really nice though, it makes it so you don't have to lead your shots as much, also even tho it says "bullet" speed, this also makes rockets fly faster.
-B0re: (one point) Shots pierce through enemies, +100% Damage per enemy pierced, also highlights crit spots while in Decepti0n. This skill is awesome, one of the best in the game. It sounds great just reading it but what it doesn't say is that "enemies pierced" is actually hitboxes, some enemies have multiple hitboxes, and "+100%" means double, as in if you have a 1000 dmg gun, it will do 1000 on the 1st hit, 2000 on the 2nd, 4000 on the 3rd, etc. If you stack this right it's possible to kill lvl 72 Hyperius the Invincible (a raid boss if you dunno) with a lvl 1 white rarity pistol in less than one clip of ammo.
-> 4th tier
-Kill C0nfirmed: bonus Critical Hit Damage the longer you ads before shooting, up to +40%. This is good if you like slowly clearing camps and the like, synergizes well with 0ne Sh0t 0ne Kill, doubling your damage together. Kinda pointless during firefights though.
-> 5th tier
-At 0ne With The Gun: +125% Hip-Fire Accuracy, +50% Reload Speed and +5 Mag Size with Snipers. The reload and mag buffs are good bonus dps for snipers. The hip-fire accuracy is pretty niche tho, unless you wanna try doing 360 no-scopes or something.
-> Capstone
-Critical Ascensi0n: hitting a crit spot with a sniper gives you a stack of Critical Ascensi0n, stacks give +5% Damage and +6% Critical Damage with snipers, stacks start decaying after 6 seconds of not hitting a critical spot and after that decrease by 1 stack per 2 seconds., you can have up to 999.
So this can give you up to +4995% sniper gun damage and +5994% sniper critical damage, which would be broken as fuck. It's pretty unlikely that you'll manage to stack the buff that high though, it's theoretically possible if you play coop with a Salvador player who uses an ammo regen class mod, but outside of that you're not getting the stacks cap. On the other hand, even a fraction of that is still amazing. Even if you're not good at rapidly criting mooks, this still helps you wreck bosses.
Cunning Tree:
-> 1st tier
-Fast Hands: +25% Reload Speed, +50 Weapon Swap Speed. This is pretty good overall cause snipers tend to have slower reloads and the swap speed is nice if you use a melee bonus gun.
-C0unter Strike: after getting hit your next melee has a chance to do +250% Damage. I don't like that one much cause I'm not fond of luck-based skills, you could compensate the "chance" part by getting hit on purpose but since Zer0 is not tanky that's not a great plan.
-> 2nd tier
-Fearless: +25% Fire Rate and +15% Gun Damage while your shield is depleted. This sounds like a good emergency boost, but as I said before, Zer0 is squishy, you don't keep fighting with him when you're taking heavy damage.
-Ambush: +20% Damage from the back or to enemies aggro'd to something else than you. This sounds kinda situational but this applies 100% of the time you're in Decepti0n, which should be very often.
-> 3rd tier
-Rising Sh0t: every hit gives you +10% Gun Damage and +9% Melee Damage, this can stack up to 5 times. So up to 50% gun damage and 45% melee damage. It's ok on its own but really good if you also get Execute and Many Must Fall from the next tree.
-Unf0rseen: the decoy explodes into a shock nova when Decepti0n ends. The damage formula for this is 1.13 to the power of your level times 78 times the skill rank, so maxed out, at level 72, it deals 2 586 500 shock damage. Or up to 5 690 300 shock damage if you have a class mod that gives +6 Unf0rseen. Which is pretty solid damage. if you have Many Must Fall, each kill in Decepti0n somehow counts as ending the skill even though it extends it, so you'll get several shock explosions, which is cool.
-Death Mark: (one point) Dealing melee damage to an enemy marks it for death for 8 seconds, while it's marked the target takes +20% damage from all sources (so barrels, other enemies, etc too). Obviously this is better the more you melee, and if you melee often enough is pretty good.
-> 4th tier
-Innervate: while in Decepti0n you get +10% gun damage, +35% Movement Speed and +4% Health Regen per second. Moving faster is good cause the timer is limited, regen is nice since you're a glass cannon, not sure what's the point of gun damage tho, Decepti0n already gives a lot, this little hardly matters.
-> 5th tier
-Tw0 Fang: 30% chance to fire 2 shots at once every time you shoot. Yes this applies to full auto and rockets too, and double pellet count on shotties. From farther away with snipers chances are the 2nd bullet can miss though, still pretty cool to have.
-> Capstone
-Death Bl0ss0m: pressing the action skill button while in Decepti0n throws 4 kunai in a spread in front of you up to 5 times, they have random elements, they don't end the skill when used, as opposed to other attacks, they can apply Death Mark.
This has a couple unlisted characteristics too. Each kunai can apply DM so you can technically mark 4 enemies at once. And the kunai count as melee attacks so anything that boost melee damage buffs them too. Random element includes Slag so this can be used as a slagging method, tho obv it's not super reliable since it's randomized. Also it synergizes with Many Must Fall because every time MMF extends the timer it's counted as entering Decepti0n again, so you can throw kunai 5 times, kill something with melee (which counts kunai kills since they're melee attacks) and get a new set of 5. This means that if your kunai kill enemies, you have unlimited kunai. Speaking of kunai kills, they are a thing yes, you can kill badasses by throwing some kunai at them.
Bloodshed Tree:
-> 1st tier
-Killing Bl0w: +500% Melee Damage against low health enemies. If you're wondering, this doesn't mean mooks with low max hp, this applies to ANY enemy with 30% or less of their max health remaining. And it's calculated after everything else in the damage formula, so basically (your melee damage)+(any skill or weapon bonus that buffs melee) times 5. Or times 11 with a +6 class mod. If built and geared properly you can whittle down a boss to ~1/3 of its bar and then finish them with one melee.
-Ir0n Hand: +15% Melee Damage and +15% Health. You want to do melee, best stack the most melee buffs you can. And you're the squishiest class, a bit more hp can't hurt.
-> 2nd tier
-Grim: kill skill, +3.5% Shield Regen per second and +7.5% Action Skill Cooldown Rate. This is pretty good, shield regen helps with your not-tanky-ness and the cooldown boost to your already short cooldown helps you spam Decepti0n even more.
-Be Like Water: shooting an enemy boost your next melee by 30% and meleeing an enemy boosts your next gun shot by 20%. If your playstyle alternates a lot this is obv really good. I personally don't like it that much.
-> 3rd tier
-F0ll0w Thr0ugh: kill skill, +40 Movement Speed, +30% Gun Damage and +40% Melee Damage. Needless to say this is good. If combined with Innervate this also makes you zip around really fast during Decepti0n.
-Backstab: +40% Melee Damage when hitting an enemy in the back. It's pretty easy to get behind them when you're invisible and they're aggro'd onto your decoy, so this is another buff you can stack into your sneak melees.
-Execute: (one point) Melee Override. This makes you dash towards enemies to melee them if you put them if your crosshairs. On it's own it's not that useful but if you also get MMF it's pretty good to save you time you can extend your invisibility more. It also looks cool.
-> 4th tier
-Resurgence: killing an enemy with a melee restores up to 20% of your health depending on how low it is. That's pretty cool, if you built up your melee right you can run around and one-shot a few mooks to get full hp pretty quickly.
-> 5th tier
-Like The Wind: +15% Gun Damage and +15% Melee Damage while moving. Speaking of running around one-shotting mooks, this helps you do it even more. Not 100% confirmed but I'm also pretty sure that Execute's dash move counts as "while moving".
-> Capstone
-Many Must Fall: melee kills during Decepti0n spawn another decoy and extend the timer.
Yes you still get the huge melee bonus. Ideally if you stacked enough melee buffs you can enter Decepti0n at the start of combat and only come out of it after you butchered every enemy. This skill is amazing.
-----------------------------------------------------------------
Axton the Commando: Axton is the "boring but practical" class so to speak, and kind of a Jack of all Trades. He has good survivability and solid damage. He isn't Master of None either though, he's the best with grenades, Torgue Weapons, Rocket Launchers and Tediore reloads, he even holds the fastest TTKs on raid bosses, by chucking tediores at them. His Action Skill is Sabre Turret, predictably enough it deploys a turret. It takes 3 seconds to unfold and start firing after you throw it out, it lasts 20 seconds and has a cooldown of 42 seconds by default. It fires in bursts of 8 shots. It can be used as cover by standing behind it, even protecting you from raid boss novas, though obv it'll take damage. Note that the Sabre Turret counts as its own thing, it's bullets aren't boosted by your gun damage, it's rockets aren't boosted by your explosive upgrades and it's damage doesn't heal you when holding a Moxxi gun. On the other hand, it spawns at the instance's level, not yours, so even if you're underleveled, it is not. This extends to OP8, the turret will be level 80 there.
Guerilla Tree:
-> 1st tier
-Sentry: adds 5 shots per burst and 10 seconds of duration, bringing the totals to 13-shots bursts and 30 seconds of turret duration. You should have this regardless of what build you're going for.
-Ready: +40% Reload Speed. This is a decent dps boost but personally I don't use it because higher quality guns already have quick reload speeds.
-> 2nd tier
-Laser Sight: +50% Turret Accuracy. So this sounds good on "paper" but in practice, the turret hits pretty much everything by default, the only things this skill helps hitting is Rakks if they're really far away (but rakks always divebomb you so they put themselves in range) and Surveyors because they fly too fast, but the turret can hit them a bit still, and they also put themselves more in range when attacking, sometimes they even stop and hover in place when repairing Loaders.
-Willing: +75% Shield Recharge Rate and -60% Shield Recharge Delay. I don't think I need to comment this, it's obv great, especially when paired with Preparation.
-> 3rd tier
-Onslaught: kill skill, +30% Gun Damage and +60% Movement Speed. This is great for dps and indirect survivability, I don't personally use it because I put points in other things for my build, which mostly uses the other 2 trees, but if you want to use Guerrilla you should pick this.
-Able: damaging an enemy regenerates 2% of your health per second for 3 seconds. This isn't a kill skill but it "stacks" the same way, if you deal damage again within 3 seconds the timer resets. Turret damage doesn't count but DoTs do, every elemental tick resets this. Also pretty good survivability then, better if you use more elemental weapons.
-Scorched Earth: (one point) adds 22 rockets to every burst fire of your turret. This kicks ass, makes your turret so much better. On top of a massive damage boost this also does stuff like, damaging badass Nomads through their metal shields with the splash damage. Note: it reduces the damage from the turrets normal guns by 13%, but it's still a massive boost to total turret damage anyway.
-> 4th tier
-Grenadier: increases your grenade capacity by 5. This isn't bad but because of ammo from drops and boxes you don't usually run out anyway. It's useful while leveling cause it can save you Eridium for other SDUs, and going from 3-4 grenades to 9-10 is more useful than going from 10 to 15. It also solidly boosts the damage of the "throw all your grenades at the boss" tactic.
-> 5th tier
-Crisis Management: +35% Gun Damage and +30% Melee Damage when your shields are depleted. This might sound like a good emergency boost but it's actually pretty meh. If you have Willing, which you should, your shields being depleted is a very short period, having both is counter productive and Willing is more useful more of the time. Also the melee boost is kinda dumb
-> Capstone
-Double Up: adds a second gun to the turret and both guns fire slag bullets. So this isn't really bad but, eh. Slag doesn't boost the slag bullets, your turret will slag stuff for you but it doesn't boost the turret itself. It will boost the missile volleys but if you slag with a gun or grenades instead, that'll boost the missiles and the turret shots too, by making your turret slag element you lose that. True having 2 guns per turret does double the turret guns damage, but so does getting Gemini and having 2 turrets, which you can boost further by slagging, and which also gives you 44 missiles bursts.
Gunpowder Tree:
-> 1st tier
-Impact: +20% Gun Damage and +15% Melee Damage. Good flat boost, the melee boost isn't that useful but it's not a negative.
-Expertise: +70% Weapon Swap and Aim Speed; +35% Movement Speed when ADS. Eh...I mean, do you switch guns mid-fight that often ? Aim speed is quick enough for the majority of guns anyway and at least personally, I don't really move much while ADS, or when I do I don't feel like it's too slow and hinders me.
-> 2nd tier
-Overload: +50% Magazine Size for Assault Rifles. Pretty clear cut, this is good if you use ARs, pointless if you don't.
-Metal Storm: kill skill, +60% Fire Rate and +75% Recoil Reduction. Pretty great dps skill, shooting a lot faster and being able to stay on the crit spot with automatic fire wrecks shit. I don't use it for my build cause putting the 5 points elsewhere helps me more.
-> 3rd tier
-Steady: +40% Recoil Reduction, +25% Grenade Damage, +20% Rocket Damage. Pretty baller, less recoil as a passive is really useful, grenade damage also boosts Tediore reloads and Torgue weapons (gyrojets are counted as grenades) and rocket damage also boosts the grenade launcher type ARs, since their "grenades" are counted as rockets.
-Battlefront: +30% Gun, Melee and Grenade Damage while the turret is deployed. Aside, like Impact, the melee boost being of questionable use, this is great since you should have your turret out most of the time. Also goes really well with the anti-boss tactic of "throw out the turret, chuck all your grenades at it's feet and pump it's face full of lead" since it boost 2 of those 3 things.
-Longbow Turret: (one point) +10000% deploy range and +110% Turret Health. So first off, I don't know if the range boost is legit 10k% or it's just a silly number Gearbox used as a joke, but you can send your turret across pretty huge maps with this, if you find a distance where it doesn't work it's probably too far away for it to shoot whatever you're fighting anyway. A little over doubling it's health is really useful too. Note, if you throw it at a wall or ceiling without also having Mag-Lock, it will bounce off and fall to the ground before starting to unfold, so you'll extend the deployment time if you do that. If you throw it out of the map though it'll just despawn without deploying and you'll keep your Action Skill charge.
-> 4th tier
-Duty Calls: +25% Gun Damage and +15% Fire Rate with Non-Elemental Guns. If you find good non-elementals this is great, it's just a bummer if you spec into this and happen to only find elemental guns. But you can respec pretty easily in BL so not really an issue.
-Do or Die: (one point) allows you to throw grenades in Fight For Your Life, also +10% Grenade and Rocket Damage. Stacks well with Steady, applies to the same misc stuff. Grenades in FFYL can have extra uses depending on the type of grenade mod you're using. Singularity can be used to draw fleeing enemies to you for exemple, Homing can be similarly useful. MIRV too if you're surrounded by melee enemies.
-> 5th tier
-Ranger: +5% to Gun Damage, Accuracy, Critical Hit Damage, Fire Rate, Magazine Size, Reload Speed and Max Health. This is a bit hard to rate, on one hand, the boosts are pretty small, but if they were big boosts this would be pretty unbalanced. It woulda been better imo if they cut say, accuracy, crit damage, reload and maybe firerate, and just made it like, +15% Gun Damage, Magazine Size and Max Health.
-> Capstone
-Nuke: sets off a mini mushroom cloud when you deploy your turret. The initial blast is explosive damage and it applies burn DoT to anything it doesn't kill. The explosion goes through cover and has a range of 15 meters centered around the turret. The Explosive and Fire DoT damage scale with Axton's level (not the turret's) but isn't boosted by Skills, Relics or Badass Ranks, because those are buffs to grenades, guns or rockets specifically, not to elemental damage itself, and the Nuke counts as pure elemental damage.
Survival Tree:
-> 1st tier
-Healthy: +30% Max Health. 30% is the 2nd biggest health boost total of any +max health skill in the game. Axton can also get his health to +40% if you pick Forbearance and Ranger on top of this. So pretty solid.
-Preparation: +15% Shield Capacity and +2% Health Regen per second while your shield is full. Also pretty good for tanking, especially combined with Willing.
-> 2nd tier
-Last Ditch Effort: +40 Gun Damage and +70% Movement Speed while in FFYL. Some people are all "this is shit, if you're good and are using the tanking skills tree you should never go in FFYL". Shut up, you're gonna go down some times, and when you do, doing 40% more damage will help alot, also you crawl in FFYL, any speed boost to that is nice.
-Pressure: Up to +70% Reload Speed and -60% Shield Recharge Delay depending on how low your health is. This helps when get back to readiness faster when you take cover but when in cover you usually already have enough time. This isn't bad, it's just less useful in practice as other stuff.
-3rd tier
-Forbearance: -40% status effects duration on you and +5% Max Health. This is the same as Salvator's Asbestos but with a bit of max hp on top. Helps a bunch with surviving DoTs, which are more dangerous the more you up the difficulty, so this is good and gets better over time.This also makes Slag shorter and obv taking double damage (triple in UVHM) for less long is kinda useful.
-Quick Charge: kill skill, +5% of your shield per second. Basically "Able" but for shields. Same comments apply. Having both would be pretty good too.
-Phalanx Shield: (one point) turret projects a shield bubble about 3 meters wide. It can be broken but mostly only by direct impact damage, it can take elemental DoT based attacks (like the Warrior's fire breath) for the entire duration of the turret. Speaking of which, the Phalanx completely blocks status inflicting attacks and novas. Enemy projectile don't traverse it (obv) but yours do. Melee attackers can walk through and it the turret directly but leaping thrown melees (like Psycho axes) are still blocked and leaping melees (like Goliath jump attacks) will be absorbed. The shield will take the damage and the Goliath's slam will do nothing to the turret or anyone inside the shield.
-> 4th tier
-Resourceful: +25% Action Skill Cooldown Rate. Gives you your turret back faster, why wouldn't you take this ?
-Mag-Lock: (one point) your turret can now stick to walls and ceilings. This says "mag" but it will stick to all surfaces. This is really useful. On top of increasing deployment tactics, especially combined with Longbow Turret, this also increases the turret's survivability because enemies have a harder time shooting in on a wall or ceiling for some reason. Also if you throw it on a temporary surface, like say an ION-Loader's shields, it will stick to it and stay in mid-air when they shield turns off.
-> 5th tier
-Grit: 20% chance to ignore damage that would kill you and instead instantly regain 50% of your Max Health. 20% is too low to be reliable or that useful imo so I don't use this. You can get this to 44% chance with class mods that give +6 to it though.
-> Capstone
-Gemini: allows you to deploy 2 Turrets. As mentioned before, this is way better than Double Up. All turret upgrades apply to the 2nd one too, so they'll both have missile pods, stick to walls, have shields, set off Nukes, etc. Notes: they shared the duration bar if you deploy the 2nd with 2 seconds left, it will only last for the remaining 2 seconds. Reclaiming 1 turret reclaims both of them. If you reclaim 1 turret while the other is in the middle of unfolding it will explode instead of being reclaimed normally and this counts as a kill, it will trigger all your kill skills.
-------------------------------------------------------------------------------------------------------------------
Maya the Siren: Maya is the elemental crowd control/debuffer class, and also the primary healer. She's also pretty much the best tank in the game outside of Grog-Nozzle!Salvador and the 2nd best sniper after Zer0, and even then, that's only in terms of pure damage and boss wrecking, Maya kills mobs better with snipers than Zer0 does. Unless you use Cat type class mods she sorta lags a bit in pure DPS but that's where being the crowd controller comes in. Rather than pure gun damage, explosions or crushing melee, Maya stacks all the status effects on everything, locks them in place and throws enemies around until they helplessly die. Her Action Skill is Phaselock, it traps the targeted enemy in a sphere where they stay immobilized. The base duration is 5 seconds, base cooldown is 13 seconds (which I'm pretty sure is the fastest recharging Action Skill across all VHs). Without any skills it deals no damage on it's own except to targets who cannot be Phaselocked, which I'll list below. The damage formula for this is 200 Base Damage times 1.13 to the power of your current level. So about 1.3 million at level 72, which is pretty low, especially since lots of the enemies that can't be Phaselocked are bosses and enemies in UVHM have regen. However if you have Helios and/or Ruin, those are still applied even if the target isn't immobilized. Still at level 72, Helios will deal 53 056 on the initial hit followed by 59 688 Burn DoT per second for 9 seconds, totalling 537 192 damage (spoilers, Helios is garbage at high levels). Ruin otoh, deals 3 initial hits of 47 750 each, Slag then Shock then Corrosive in the animation but they're considered simultaneous by the game so the initial Shock and Corrosive hits aren't multiplied by Slag. Their DoTs are though. They both do 47 750 dmg/s but the Shock DoT lasts 14.4 seconds while the Corrosive DoT lasts 57.6 seconds, totalling 2 062 800 and 8 251 200 respectively. Which is a lot better, and also applies not only to the target but to every other enemy around it.
List of enemies who cannot be Phaselocked: Threshers in general, Loot Goon Goliaths, One Armed Bandits, Buzzards, Constructors, Ultimate Badass Varkids, most land vehicles, Sand Worms in general, both Handsome Jack and his Body Double, Pyro Pete, Motor Momma, Piston, Dukino's Mom, Saturn and all Raid Bosses.
Motion Tree:
-> 1st tier
-Ward: +25% Shield Capacity and -40% Shield Recharge Delay. Pretty solid tier 1 shield skill, not really any reason you wouldn't pick this.
-Accelerate: +15% Gun Damage and +20% Bullet Speed. It's a bit low at first glance but you have to know: Elemental guns all have unlisted extra splash damage, which is a % bonus based on the base damage of the gun. On Maliwans iirc the splash is 80%, so with an hypothetical 100 dmg gun, you'd do 115+92 dmg rather than 100+80. And obv this gets exponentially better the higher level your guns are.
-> 2nd tier
-Suspension: increases the duration of Phaselock by 2.5 seconds. Obv you'll want to take this. Aside making your crowd control better, this also boosts all the "while Phaselock is active" skills.
-Kinetic Reflexion: kill skill, bullets deflect off of you, reducing damage to you by 50% and dealing 100% damage to enemies. This is a mixed bag. Positives are, it says "reducing damage", which makes it sound like Damage Reduction, but it's actually Damage Resistance. The difference is 50% Reduction would actually be 33.33% damage mitigation, whereas 50% Resistance mitigates 50%. We know this because if you use a Class Mod to boost this to 11/5 you'll have 110% Bullet Damage Resistance and Bullets actually heal you. Also deflected bullets count as your bullets, so they're boosted by Accelerate, Reaper and Immolate, they can re-reflect if you have Chain Reaction and they can apply Cloud Kill. Negative is mostly that, enemy damage is pretty small compared to enemy health, especially at later levels, so even doing 220% damage at 11/5 they're not that effective at killing enemies. If you want this effect it's better in practice to get the Antagonist seraph shield.
-> 3rd tier
-Fleet: +50% Movement Speed when your shields are depleted. This kinda makes Ward counter-productive, and better shields all the time is better survival than moving faster a little bit here and there. You can make it work if you build based on it, with Banshee class mods, if you want. But it's better to just just be a tank imo.
-Inertia: kill skill, +4% Shield Regen per second and +50% Reload Speed. This isn't bad, you can safely take this without wasting the points. I personally don't use it on my build because I have Ward and Foresight at 10/5 so I have -80% Shield Delay and +50% Reload Speed as always-on passives, making it pretty obsolete.
-Converge: (one point) This adds a Singularity effect to Phaselock, except with a way bigger range than singularity grenades. This skyrockets your crowd control, boosting the effectiveness of Helios, Ruin, Scorn and Chain Reaction. It also deals a negligible 53 056 damage (at lvl 72) to every enemy it pulls in. You should always pick this.
-> 4th tier
-Quicken: increases Phaselock cooldown rate by 30%. Good but since the cooldown is already only 13 seconds you're not really losing much by putting your points elsewhere.
-> 5th tier
-Sub-Sequence: 100% chance that the Phaselock bubble transfers to another enemy if the target dies before it ends. So the thing is, the transfer process is that the bubble slowly floats off towards the closest enemy. With Converge this can be not too bad since enemies will be close, but if they're farther for any reason, this makes it so you have to wait for the bubble to uselessly float around before the cooldown starts. It's kinda meh imo. IF you're interested though, note that the bubble locking on a new target sort of counts as a new activation so it will proc Helios, Ruin and Converge again.
-> Capstone
-Thoughtlock: instead of immobilizing the target Phaselock now brainwashes them to your side, also increases the Duration by 4 seconds. It says it increases the cooldown too but it actually doesn't. This is a really lame Capstone. It has a few positives (aside the obv duration boost), namely that it will make Surveyors heal you, and Elated, Wreck and Chain Reaction still work with the target is brainwashed. Converge and Helios also proc. The negatives though are that, speaking of, Helios activate, so now your new ally is taking Burn DoT. No biggy, don't pick Helios, fine. But it doesn't proc Ruin, if you have both, this one removes Ruin. Dealbreaker right there. Also enraged Goliaths stay berserk and still attack you, any enemies that can't be immobilized also can't be brainwashed, and brainwashed enemies aren't counted as allies, they just have 0% aggro towards you, meaning you (and coop partners if applicable) can still damage them, so all of your AoE elemental stuff is likely to kill your "ally" and you also lost a big chunk of your crowd control. And to top it off, as I mentioned above, enemy damage is low compared to enemy health, so chances are your mind-puppet ain't gonna kill shit either.
Harmony Tree:
-> 1st tier
-Mind's Eye: +25% Critical Hit Damage and +30% Melee Damage. Again, not sure what the point of the melee boost is. Critical buff is good though. Crit bonuses are multiplicative on top of the gun damage so this another thing Accelerate indirectly boosts.
-Sweet Release: killing a Phaselock enemy releases 5 healing orbs that can heal you and allies for up to 15% of your max health. Some precisions, if you're playing solo then obv, all orbs go to you. The 15% of max health is based off Maya's health, so in most case it should actually be more than 15% of allies' health. This is pretty good healing regardless of solo or coop play, ofc being better personal survivability if you're alone, although if boosted by a class mod there can be enough orbs to fully heal you and have leftovers to heal the others too.
-> 2nd tier
-Restoration: +15% Max Health and can attack allies to heal them for 30% of the damage. For solo play you don't really need this, even if you want lots of health, since you can do that with class mods, shields and relics. If playing coop, you don't really need to max this out, since player damage is balanced to kill enemies who have exponentially more hp than you, even with 6% at one point investment you can fully heal an ally pretty quickly.
-Wreck: +50% Fire Rate and +30% Gun Damage while you have an enemy Phaselocked. Great dps boost, if it's not clear that buffs are general buffs for the duration of Phaselock, you don't do +30% damage only to the target, it's basically her version of Axton's Battlefront.
-> 3rd tier
-Elated: +5% Health Regen per second for you and allies while an enemy is Phaselocked. Same deal as Restoration, the 5% is based off Maya's hp so usually allies will be healed more than 5% of their hp per second. Needless to say that's also great survivability and useful regardless of solo or coop.
-Recompense: taking damage has 50% chance to deal equal damage to your attacker. So normally I'd say being chance based makes it dubious, but this has no proc cooldown and it's 50% so basically, enemies in general take the damage of half of their attacks. The reason this is dubious anyway is that, as mentioned before, enemy damage does pretty much jack shit to enemy health.
-Res: (one point) using Phaselock on a downed ally instead of an enemy instantly brings them out of Fight For Your Life. This still counts as activating Phaselock so you'll be on cooldown. Like Phaselock it also has kinda limitless range since Phaselock is based of targeting, so you can scope on a far way target with sniper (or any scoped gun you have) and Phaselock will work. The downside of this is, it's pointless for solo play, obv.
-> 4th tier
-Sustenance: +2% Health Regen per second. Pretty straightforward, this gives you always-on passive healing. As it's % based it's also better the higher max hp you have. It helps a bunch against DoTs.
-> 5th tier
-Life Tap: kill skill, +6% Life Steal. So pretty much, this gives you a Moxxi Gun effect without having to hold a Moxxi Gun. You have to kill to sustain it but when in battle with mobs kill skills are more or less always on, and 6% is also higher than most Moxxi Guns, only beaten by the Rubi (12%) and Grog Nuzzle (65%), except you can have Life Tap while using way more powerful weapons. The only life steal effect better than this is Grog-Nuzzle!Salvador, which is lolwtf broken, so that's pretty good.
-> Capstone
-Scorn: Melee Override, throws a ball of Slag that constantly damages enemies near it, has an 18 second cooldown. This is super useful. It does many things so I'll just list in no particular order. First warnings: it targets anything that you can damage in an area around it so it can explode barrels if there are any near you when you activate it, and if it explodes near you it will slag you. Positives, uses and misc characteristics: It doesn't count as a Melee Attack so melee boosts don't improve it, however melee cooldown buffs do make it recharge faster. It also doesn't work for any task that require melee attacking, like issuing or accepting a Duel or getting Bullymong Fur for the quest Bad Hair Day. You can use it while climbing ladders and during Fight For Your Life (which is awesome, double/triple damage while trying to revive). It doesn't trigger aggro, you can Slag a far away enemy with it and still snipe them while they stand around. As stated before it will target everything you can damage, so it will "open" Bullymong, Skag and Stalker piles, explode barrels, etc, and more importantly (and awesomely) enemy rockets, including missile barrages from Constructors or Saturn, meaning you can stand in front of a giant missile spewing robot, throw Scorn into it's barrage, and take zero damage from their strongest attack. It technically explodes on contact with any surfaces but it's hitbox is actually just a small orb in the center of it so most of the type it more or less passes through objects. Note/Tip: it's better to throw it between or above enemies because that way it will Slag the entire group (ya btw it can Slag entire groups) instead of just the one you aimed at if thrown directly at an enemy.
Cataclysm Tree:
-> 1st tier
-Flicker: +30% Elemental Effect Chance. Being more likely to apply DoTs is pretty good when you're the DoT class. Note though than it's multiplicative 30%, not additive, so with a base 50% chance elemental gun you would have 56.5%, not 80%.
-Foresight: +20% Magazine Size and +25% Reload Speed with all gun types. Pretty good indirect dps for a tier 1 skill. Especially useful with Snipers and Jakobs ARs imo.
-> 2nd tier
-Immolate: adds +50% Damage as Fire Damage to all shots fired during FFYL. The 50% is based off your equipped weapon's damage, which already sounds pretty good right ? Bonus, it's calculated multiplicatively after everything else in the damage formula, and is also boosted further itself on flesh targets, so not (base gun dmg + 50%) but (base gun damage + gun dmg skills (x crit multiplier if you happen to crit) x slag x 1.5 (x 1.75 if shooting a flesh enemy). Basically, this kicks Last Ditch Effort in the dick.
-Helios: Phaselocking an enemy causes a fiery explosion. This is pretty cool, especially combined with Ruin, resulting in Phaselock having all the elements. Unfortunately, as I spoiled above, it does more or less useless amounts of damage at high levels. It also triggers before Ruin so it doesn't get the Slag boost (unless you slagged stuff before Phaselocking). It's not terribad but points are better spent elsewhere.
-> 3rd tier
-Chain Reaction: while you have an enemy Phaselocked, all of your bullets that hit an enemy have 40% chance to ricochet into another enemy. Ricocheted bullets still do full damage. This is chance based but, if you're using a rapid-fire weapon, like an SMG, which you should be because these are the best for applying DoTs, that's a lot of extra damage to enemies you're not even shooting at. As stated above, reflected bullets from Kinetic Refelction or the Antagonist can also proc Chain Reaction. If ricocheted shots were from guns with splitting projectiles (not multi-pellet like shotguns) like the Bekah, Lyuda, Pimpernel, Unkempt Harold, etc, the ricochet will also split. Yes this is potentially hax.
-Backdraft: adds Fire Damage to your Melee Attacks, also triggers a Fire Nova when you shields are depleted, shields need to recharge between novas. Again, melee boost is pretty pointless, however cool it is to set people of fire by punching them. The nova effect will trigger before the shield nova if you're wearing a nova shield, it doesn't count as an actual nova though so it can't be used to progress or complete Nova Shield related challenges. The Nova doesn't hit that hard either, at least at high levels. Ideally give this a skip.
-Cloud Kill: (one point) shooting an enemy creates a corrosive cloud at their location that lasts 5 seconds and also damages any enemy that enters it, only one cloud can be active at a time. Notes, even if the enemy exits the cloud, they still take the damage because it applies DoT. You can damage yourself with it but only if you're within it when it's created, it's safe to enter if you pass through after it has appeared. So try not to shoot stuff point plank if you have this, unless there's already an active cloud somewhere else. I couldn't find the damage formula for this but in my file at level 72 it does 1115K per tick for 5 seconds, and there are more than one DoT tick per second. It also seems to ignore elemental multipliers as it does the same damage on robots and armor as it does on fleshy targets. To give you an idea, it does enough damage to make Dr.Zed's E-Tech tutorial quest basically impossible because the Corrosive Dot kills the bandits before the E-Tech machine gun does, even while shooting full-auto directly at them. Funny side-note, it used to be garbage, it was buffed by ~3900%
-> 4th tier
-Reaper: +40% Gun Damage to enemies above 50% Health. This is multiplicative and works on everything, even bosses. Also it's specifically "above 50% *health*" so the bonus applies to all shields too. Great DPS buff, really good for sniping too.
-> 5th tier
-Blight Phoenix: kill skill, adds a Corrosive and Fire Damage AoE around you. So this can explode barrels near you and it's pretty crap at actually killing enemies at high levels. However, enemies have exponentially more health than players, and you know what else is a kill skill ? Life Tap. So long as you kill every 7 seconds or less and stay relatively close to enemies, you're basically immortal. It also looks pretty dope when active, giving you green and orange fiery wings.
-> Capstone
-Ruin: Phaselock now Slags, Shocks and Corrodes all nearby enemies. THE elemental AoE, this skill is awesome. In TVHM this can kill an entire mob on it's own. Not so much in UVHM but it still stacks enough DoTs on things to counteract their regen, and still kills some of the weaker mooks, which is pretty good considering the exponential max hp curve plus a 4x multiplier than enemies have in UVHM.